
DIY Dakboard – Digital Calendar Display
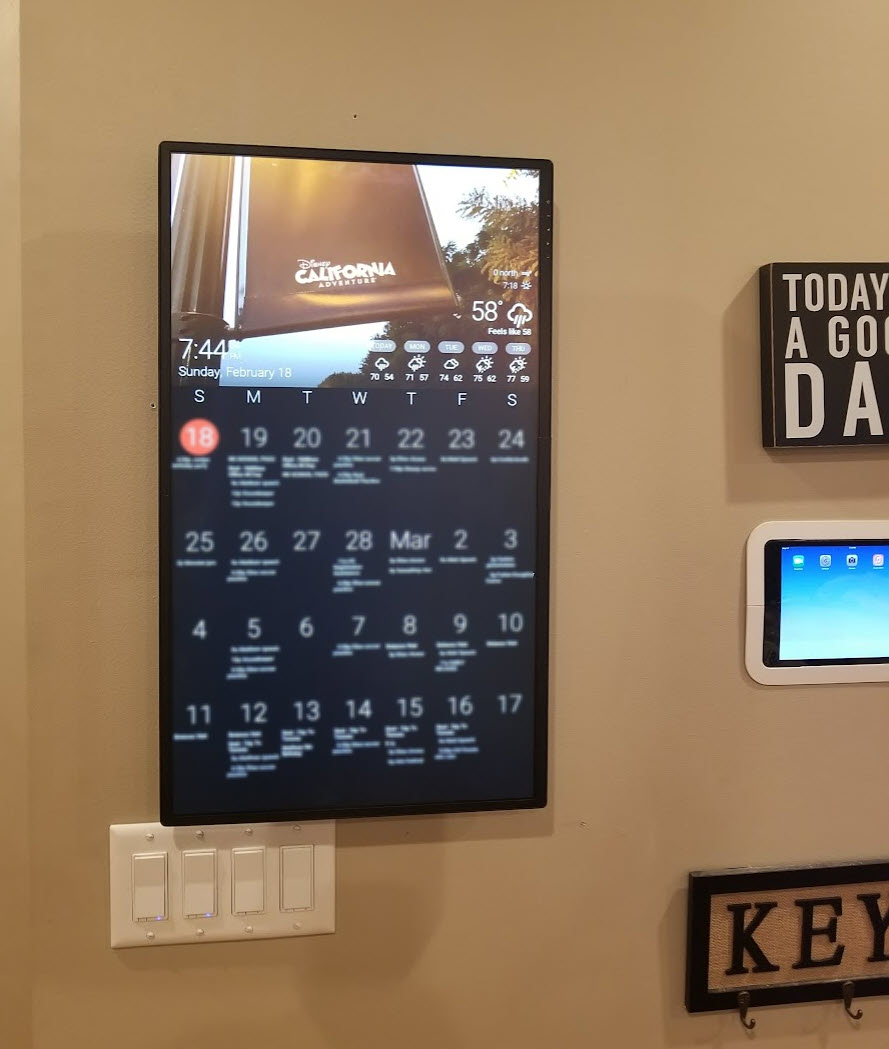
A few years ago, I had the idea to use a computer monitor to display our family calendar, which my wife lives by. She uses Google Calendar and enters all the events/sports we have as well as dinners planned, vacations, etc. I set out on a mission to accomplish this using a already made platform. Yes, I understand web design and can throw together a quick web based app that would pull Google Calendar data and display it on a web page. BUT I didn’t want something else dependent on me to manage, debug, fix, etc.
I came across DAKBOARD. And it was exactly what I needed. They sold a ready-made solution which was a monitor with a Raspberry PI attached to the back. I had a spare monitor and wanted to satisfaction as a DYI solution so I went on Amazon and ordered everything I needed.
Things You’ll Need
- LED Monitor with HDMI input (preferably an IPS panel)
- Short HDMI cable
- Raspberry Pi computer (version 3B+ or 4B recommended)
- 8GB+ SD/Micro SD card – purchase a micro SD card in our shop. It’s pre-loaded and ready to go!
- Micro USB or USB-C charger (for Raspberry Pi)
- Power Extension Cord ($7, Amazon)
- Photo Frame Wire ($4, Amazon)
Once you get your RaspberryPi, you need to install the MicroSD card and get RaspianOS installed. This has gotten much easier over the years. To learn how to do this, go here.
We need to accomplish the following:
- Setup Wifi
- Install Browser (Chromium)
- Configure Raspberry Pi to boot directly into a browser running fullscreen mode
- Remove mouse pointer
- Setup for remote management (optional)
Once you can boot the RasperryPI and get to a command line, now it gets fun.
At the command line type
raspi-configIn here, choose to:
- Boot to desktop
- Enable SSH server (optional, if you want to connect from another computer)
- Set the proper timezone
Exit and choose to reboot later.
Set your Wifi network name and password:
sudo nano /etc/wpa_supplicant/wpa_supplicant.confand change your SSID and PSK:
network={
  ssid="YOUR_NETWORK_NAME"
  psk="YOUR_WIFI_PASSWORD"
}
Then save changes and quit (ctrl-o, ctrl-x). Next, install the unclutter app, which will hide the mouse cursor after a few seconds of inactivity:
sudo apt-get install unclutter
Now we’ll make a couple system configuration changes:
sudo nano /boot/config.txt
and add
# Display orientation. Landscape = 0, Portrait = 1
display_rotate=1
You’ll also want to check and make sure that disable_overscan=1 and no other overscan configs are uncommented in this file. Save and quit when done.
If you installed the latest version of the Raspbian OS above, then skip ahead. Otherwise, update Raspbian Jessie to the latest version which will install the chromium browser
sudo apt-get update
sudo apt-get dist-upgrade
sudo apt-get install -y rpi-chromium-mods
And lastly we’ll want to force the screen to stay on, and load the Chromium browser running DAKboard on boot, so edit this file:
sudo nano /home/pi/.config/lxsession/LXDE-pi/autostart
and add:
/etc/xdg/lxsession/LXDE-pi/autostart
And now restart!
sudo reboot